
How to Use Databricks Lakebase Autoscaling for AI Workloads
TL;DR
- Lakebase autoscaling automatically adjusts compute capacity between your defined minimum and maximum Compute Units (CU) based on real workload demand, eliminating manual provisioning.
- Create a Lakebase project with autoscaling enabled in minutes via the Databricks UI or CLI, then connect your PostgreSQL-compatible applications directly.
- Set min=0.5 CU and max=32 CU to let compute scale dynamically for variable AI/agent workloads while keeping costs low.
Prerequisites
Before starting, ensure you have:
- An active Databricks workspace on AWS (Lakebase is currently available on AWS)
- Workspace admin or appropriate IAM permissions to create Lakebase projects
- Basic familiarity with PostgreSQL connection strings
- The Databricks CLI installed and authenticated (optional but recommended for automation)
- A target workload that benefits from variable compute — typically AI applications, agentic systems, or applications with unpredictable traffic
Step 1: Understand Lakebase Autoscaling vs Traditional Provisioning
Traditional database provisioning forces you into two bad choices: over-provisioning (paying for unused capacity) or under-provisioning (suffering performance issues during spikes).
Lakebase solves this by separating compute from storage. Your data lives in low-cost lakehouse storage while compute scales automatically within limits you set. The system continuously monitors workload and adjusts compute in real time — never dropping below your minimum or exceeding your maximum, regardless of demand.
Autoscaling is the forward-looking model for Lakebase. New features are being built here first, while the provisioned model continues to receive legacy capabilities.
Step 2: Create Your First Autoscaling Lakebase Project
- Log into your Databricks workspace.
- Navigate to SQL > Lakebase (or search for "Lakebase" in the sidebar).
- Click Create Lakebase project.
- Choose Autoscaling as the compute type.
- Configure the following settings:
- Minimum Compute Units: Start with
0.5CU for development or low-traffic workloads - Maximum Compute Units: Set to
8,16, or up to32CU depending on your peak requirements - Region: Match your lakehouse storage region for lowest latency
- Storage: Your data will be automatically stored in the lakehouse
- Minimum Compute Units: Start with
Example configuration for an AI agent workload:
- Min CU: 1
- Max CU: 16
- This allows the database to scale down during quiet periods and instantly scale up when multiple agents query simultaneously.
After creation, Databricks provides a standard PostgreSQL connection string. Copy it — you’ll use it in the next step.
Step 3: Connect Your Application
Lakebase is wire-compatible with PostgreSQL, so you can use any Postgres client or ORM.
Python example using psycopg2:
import psycopg2
from psycopg2.extras import RealDictCursor

def get_lakebase_connection():
    conn = psycopg2.connect(
        host="your-project-id.lakebase.databricks.com",
        port=5432,
        database="postgres",
        user="your_username",
        password="your_password",
        sslmode="require"
    )
    return conn

with get_lakebase_connection() as conn:
    with conn.cursor(cursor_factory=RealDictCursor) as cur:
        cur.execute("""
            SELECT agent_id, COUNT(*) as interactions
            FROM agent_logs
            GROUP BY agent_id
            ORDER BY interactions DESC
        """)
        results = cur.fetchall()
        print(results)
Node.js example with node-postgres:
const { Pool } = require('pg');

const pool = new Pool({
  connectionString: process.env.LAKEBASE_CONNECTION_STRING,
  ssl: { rejectUnauthorized: false }
});

async function logAgentAction(agentId, action) {
  const client = await pool.connect();
  try {
    await client.query(
      'INSERT INTO agent_logs (agent_id, action, timestamp) VALUES ($1, $2, NOW())',
      [agentId, action]
    );
  } finally {
    client.release();
  }
}
Replace the connection string with the one provided by Databricks.
Step 4: Monitor and Tune Autoscaling Behavior
After your application is connected:
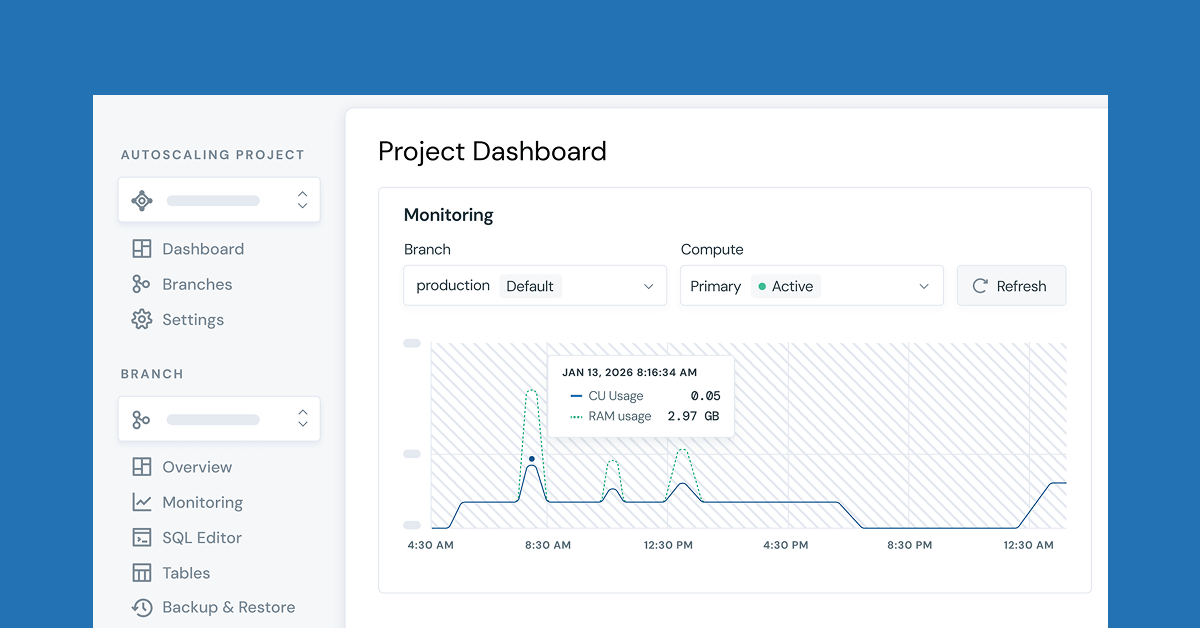
- Go to the Lakebase project dashboard.
- View the Compute Utilization graph — it shows how compute scales in response to your workload.
- Set up alerts for when compute approaches your maximum (indicating you may need to increase the max CU).
- Use the Query History tab to identify expensive or slow queries that may trigger unnecessary scaling.
Pro tip: Start with conservative min/max values. Monitor for 48–72 hours, then adjust based on observed patterns. Most AI workloads benefit from a low minimum (0.5–2 CU) and higher maximum (8–24 CU).
Tips and Best Practices
- Separate compute from storage: Take full advantage of Lakebase by storing large reference datasets in your lakehouse and only keeping hot operational data in Lakebase tables.
- Design for variable load: AI agents often have bursty patterns. Autoscaling shines here — you only pay for compute when agents are actively working.
- Use connection pooling: Always implement connection pooling on the application side (e.g., PgBouncer or SQLAlchemy’s
QueuePool) to handle scaling events gracefully. - Index strategically: Create indexes on columns frequently filtered by AI agents (e.g.,
agent_id,session_id,timestamp). - Test with realistic load: Use tools like
pgbenchor custom load scripts that simulate your agent behavior before going to production.
Common Issues
### Why is my compute not scaling down below the minimum?
This is expected behavior. Your minimum CU setting guarantees a baseline of compute. If you want more aggressive cost savings during idle periods, lower the minimum CU value.
### Why am I seeing connection timeouts during scaling events?
Implement proper retry logic with exponential backoff. Lakebase scaling events are usually under 30 seconds. Use a retry library or configure your client with automatic reconnection.
### Can I use Lakebase with my existing PostgreSQL schema?
Yes. Lakebase is PostgreSQL wire-compatible. Most schemas and queries work without modification. However, check official docs for any Postgres extension limitations.
### What’s the maximum size I can scale to?
Autoscaling currently supports up to 32 Compute Units. For larger workloads, contact Databricks for custom options.
Next Steps
After implementing basic autoscaling:
- Integrate Lakebase with your lakehouse using Unity Catalog for seamless data sharing between operational and analytical workloads.
- Explore building AI agents that directly query current operational data without ETL delays.
- Set up automated CI/CD pipelines that provision Lakebase projects per environment (dev, staging, prod) with different min/max CU values.
- Monitor cost patterns and experiment with different min/max ratios to optimize price/performance for your specific AI workload.
Lakebase represents a new class of operational database purpose-built for AI applications — one that finally unifies operational and analytical data while eliminating the pain of manual capacity planning.
Sources
- Beyond Provisioning: The Developer’s Guide to Databricks Lakebase Autoscaling
- Announcing Lakebase Public Preview | Databricks Blog
- Databricks Launches Lakebase: a New Class of Operational Database for AI Apps and Agents
- Autoscaling | Databricks on AWS
- Databricks Introduces Lakebase, a PostgreSQL Database for AI Workloads - InfoQ